The Importance of Microsoft 365 Multi factor Authentication
Many of us spend an increasing amount of our time on digital devices regardless of whether we’re at work or at home. Much of our daily routine happens online. From banking and bill paying to music purchases and social planning, there’s much you can accomplish that doesn’t require you to leave your home. Having the internet and digital networks enhances the convenience they provide, but risks exist as well. Digital information security is of paramount concern when your livelihood relies on the it being protected.
Multi-factor authentication keeps your email account secure by adding barriers that stop hackers from accessing. If a password or other authentication method is compromised, it is rare that a hacker also has access to the second authentication method.
In this article we will provide you with an easy to follow walkthrough of setting up the Microsoft 365 Multi Factor Authentication.
Microsoft 365 Account MFA Setup
Multi-factor authentication adds an additional layer of security protection to your Microsoft 365 account. This feature can be enabled at any time by users, and with Microsoft rolling out a mandatory Multi Factor Authentication for all Microsoft 365 accounts in the fall of 2022, we recommend activating this security feature sooner rather than later.
Microsoft 365 Multi factor Authentication Steps
Once this feature has been enabled you will be prompted to setup on a mobile device. The walkthrough below will guide you through this setup process.
Step 1
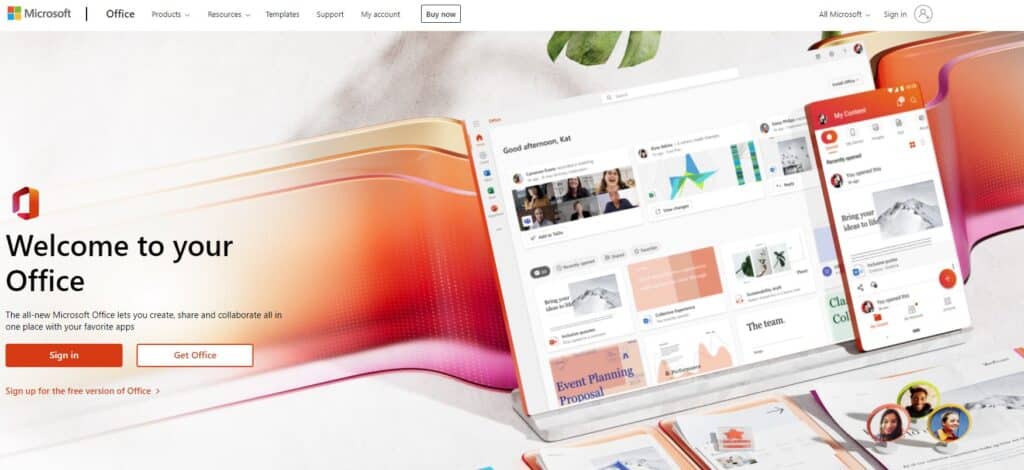
Open your browser and navigate to: www.office.com
Step 2
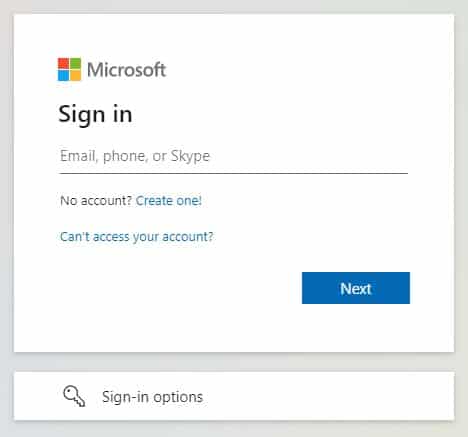
Enter your email address:
Step 3
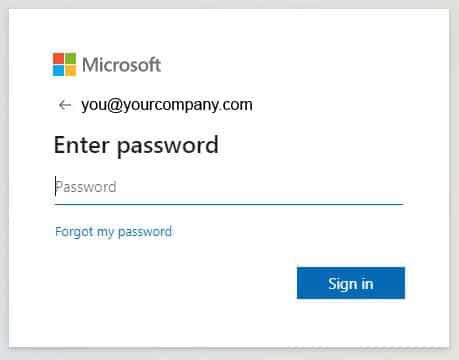
Enter your password:
Step 4
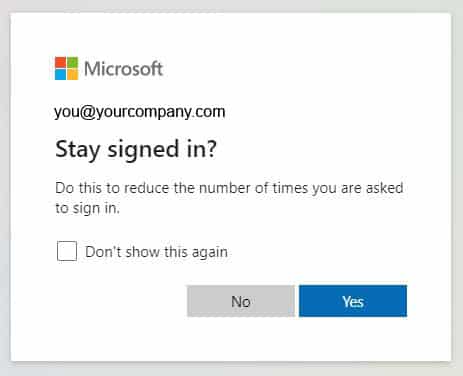
If you are signing in on a trusted device, you may select “Yes” if you are signing in from a public device it is recommended to select “No”
Step 5
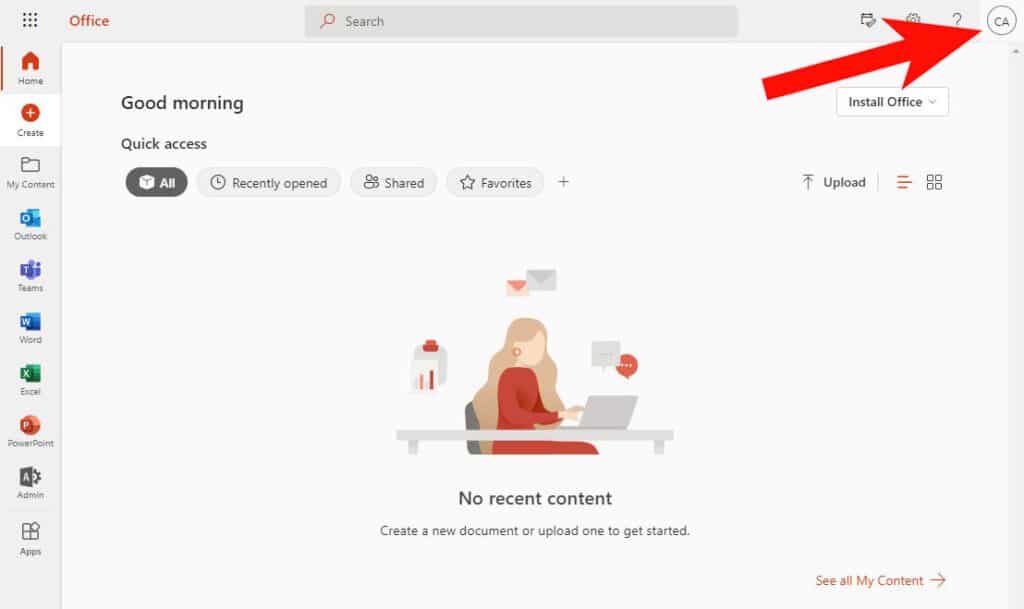
Click your user profile in the top right side of the page:
Step 6
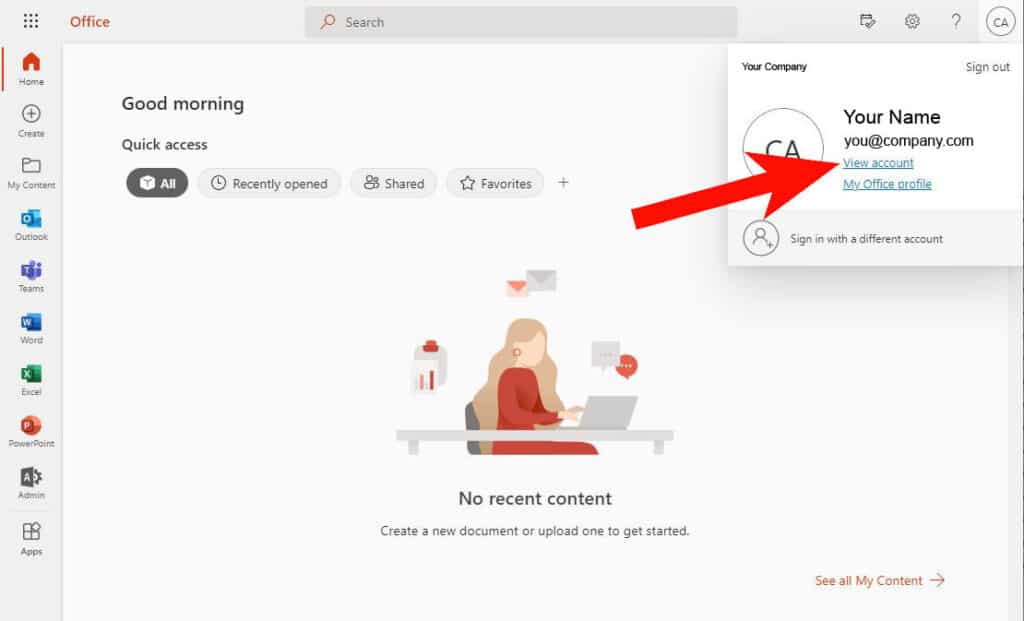
Then select “View Account”
Step 7
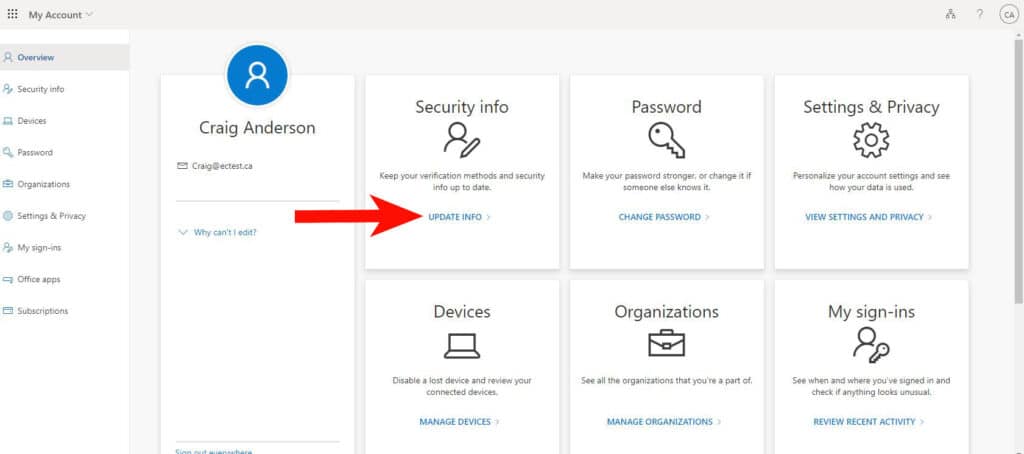
Under the “Security info” box select “UPDATE INFO”
Step 8
Select the “+Add sign-in method”
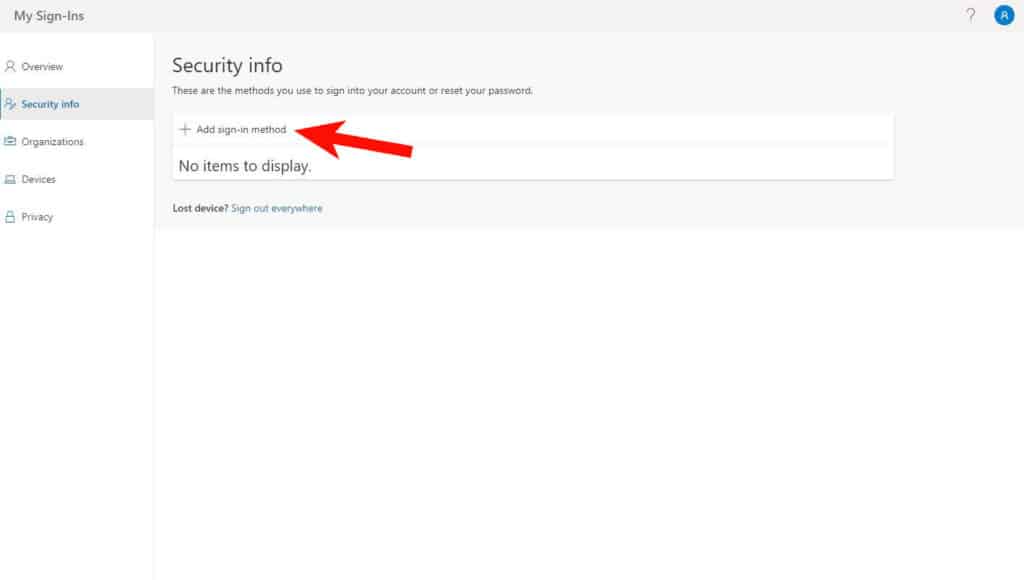
Step 9
For the purpose of this walkthrough, we will be providing info for Authenticator app. Select “Authenticator app”
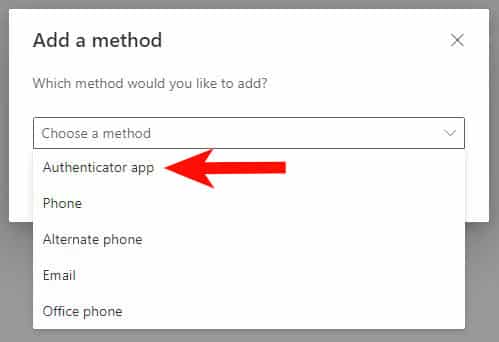
Step 10
Once you have selected “Authenticator app” select “Add”
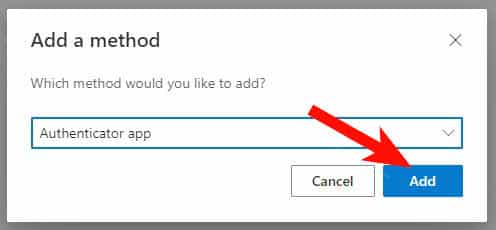
Step 11
This screen will prompt you to download and install the Microsoft Authenticator app to your mobile device select “Next”.
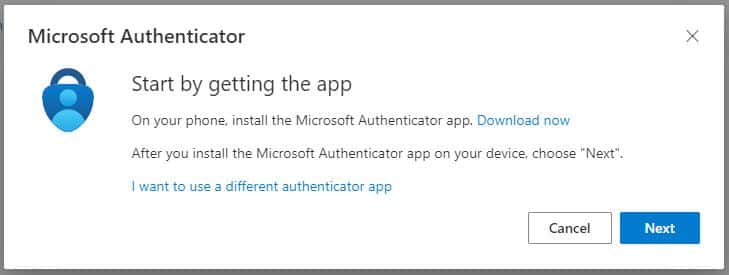
Step 12
On the next screen select “Next”
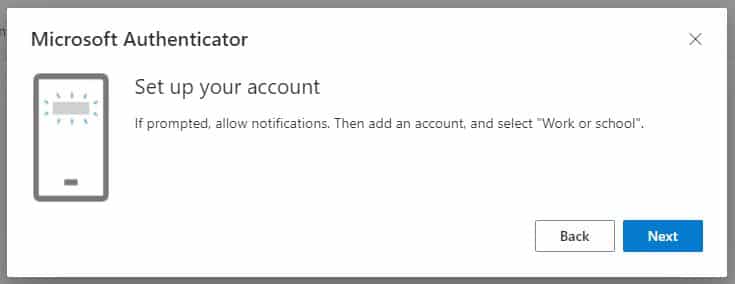
Step 13
This is where you will pause, you will see the following screen below:
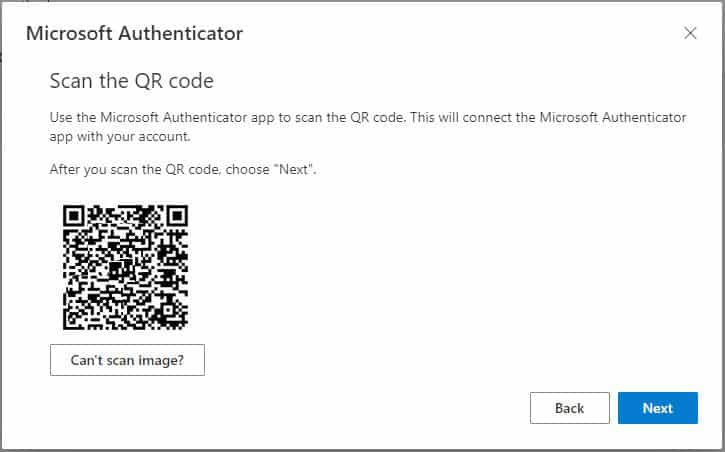
Step 14
You can now install the Microsoft Authenticator App on your mobile device. Using your iPhone or Android device open either the Apple App Store (iPhone) or the Google Play Store (Android) on your device


Step 15
Search apps by entering “Microsoft Authenticator” and select “Install”

Step 16
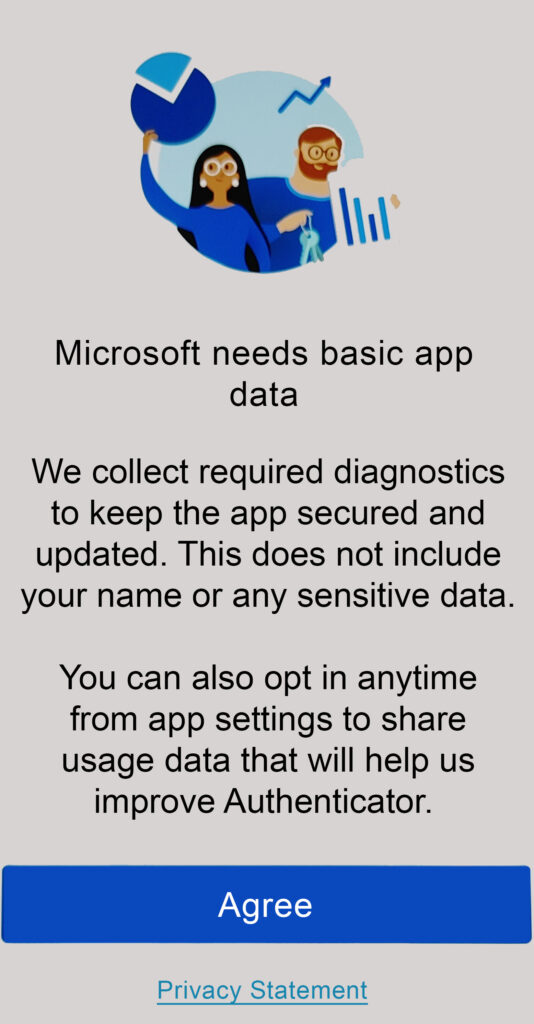
Once the app has installed on your device, open the app and select “agree”
Step 17
On the next screen select “Sign in with Microsoft”
Step 18
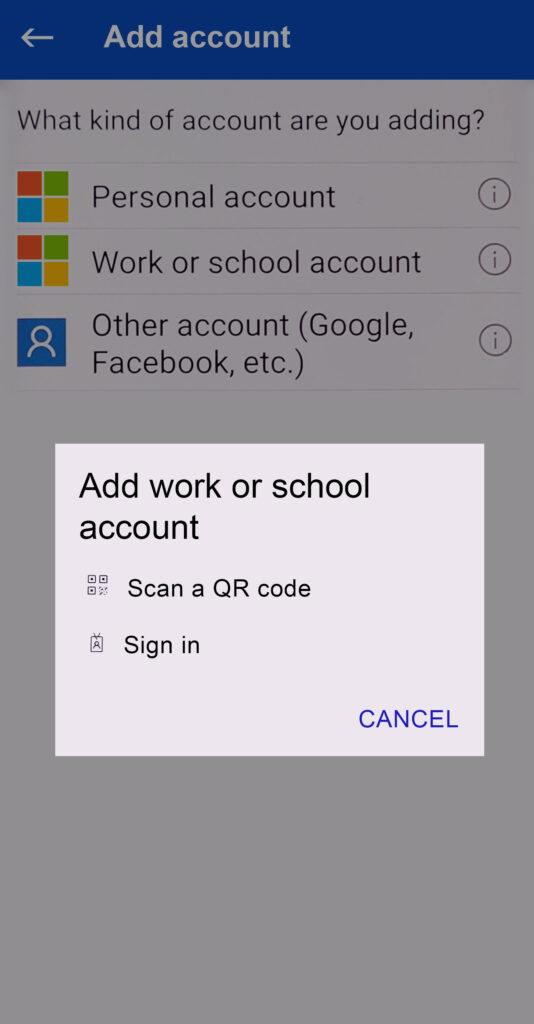
Select “Add account”

Step 19
Select “Work or school account”
Step 20
On the next screen select “Scan a QR code”
Step 21
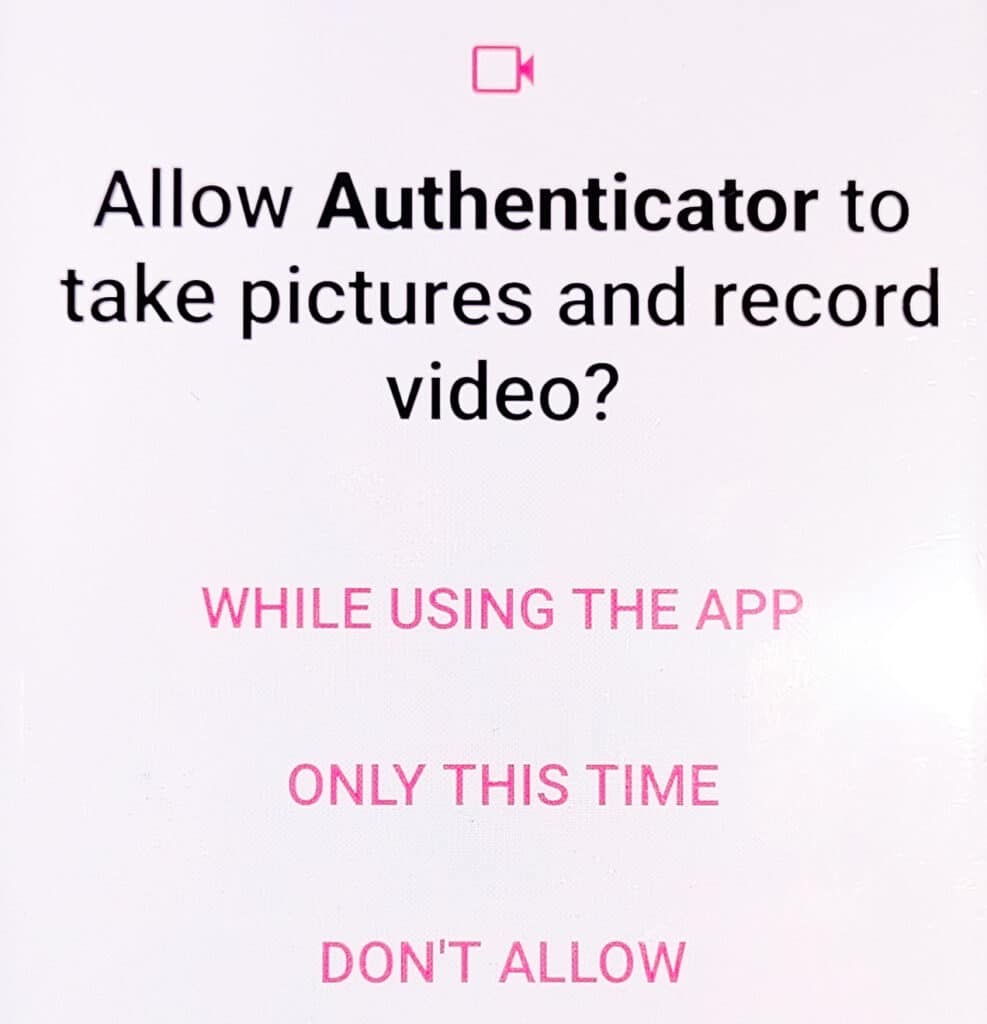
At this point the app will ask permission to activate your mobile device camera to scan the QR code that is on your computer screen. Select “While Using This App”
Step 22
Hold your phone up to the QR code on your screen and your device will now scan and add the Microsoft account to your Microsoft Authenticator App

Step 23
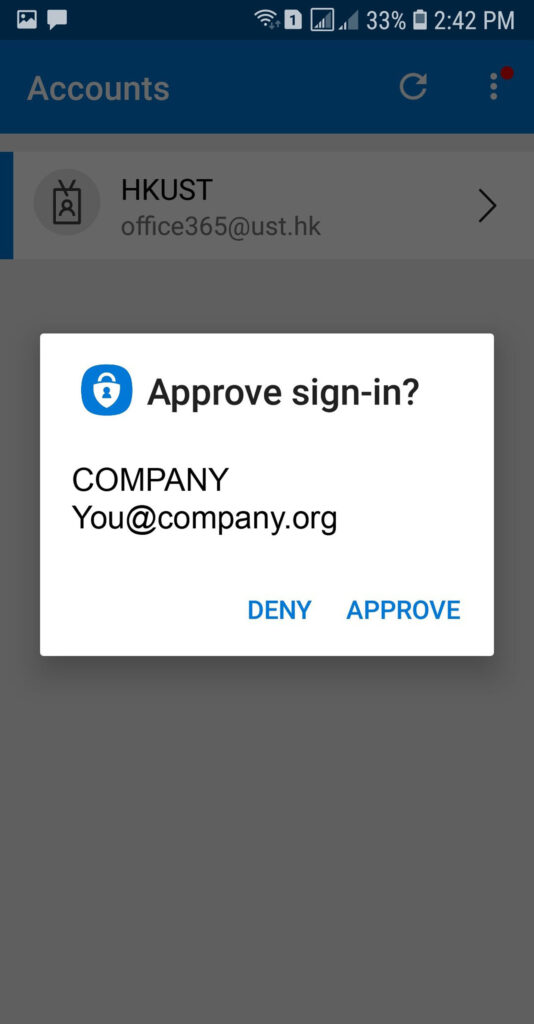
That’s it, you have now completed setting up your authentication. Moving forward when you sign onto your Microsoft 365 account from a new device, you will simply receive a notification from your mobile device to prompt you to allow or deny the sign in request.
Conclusion
The Microsoft 365 Multi-factor authentication is an important network security measure. The setup process is quick and easy and doesn’t interfere with how you work. One of the benefits of using end-point protection is that it adds another layer of security to a part of your IT environment.
If you have any questions about Microsoft 365 Multi Factor Authentication or any other concerns about your digital security EC Managed IT can help. Contact us today, we’d be happy to hear from you.

